How to Write Better Grok Imagine Image Prompts
Learn a practical Grok Imagine Image prompt structure with clear guidance and visual examples for social graphics, product shots, portraits, and image edits.

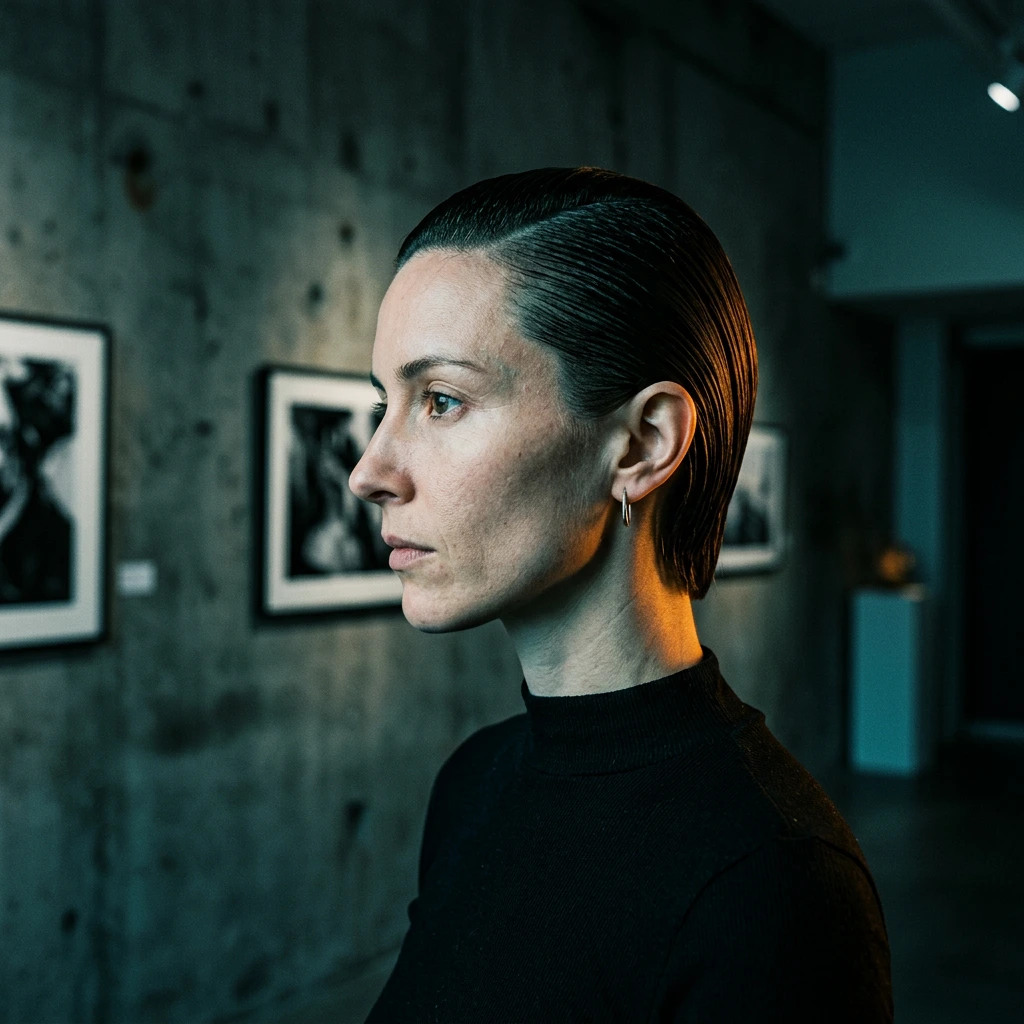
Grok Imagine Image prompts work better when they read like production notes, not collections of visual adjectives. A request such as "make a cinematic product photo" names a mood but leaves the product scale, camera position, light direction, surface, background, and final use undecided. The model must invent those decisions, so a polished result can still be wrong for your brief. If you already use a structured system such as the GPT Image 2 prompt framework, the same principle applies here: define what the image must accomplish before describing how it should feel.
This guide builds a reusable prompt order for Grok Imagine Image, then applies it to social posts, product images, portraits, and reference-based edits. It focuses on Grok Imagine Image Quality as documented in July 2026, while keeping the prompt language portable across the Grok Imagine image family. Model interfaces and supported options can change, so check the current model page before treating a setting as permanent.
TL;DR
- Start with the deliverable, canvas, and focal subject before adding style words.
- Describe composition as relationships: subject scale, position, negative space, and depth.
- Specify lighting and camera behavior only when each choice supports the intended image.
- For edits, separate requested changes from details that must remain unchanged.
- Diagnose weak output by changing one prompt layer at a time instead of rewriting everything.
The practical sequence is Goal, Canvas, Subject, Composition, Light, Camera, Finish, Constraints. That order gives Grok Imagine Image a hierarchy: first solve the communication problem, then render the visual treatment. It also gives you a clean revision method because each failure can be traced to one layer of the brief.
1. Why Most Grok Imagine Image Prompts Underdeliver
The most common problem is an undefined asset. "A runner at sunrise" could become an editorial photograph, a shoe campaign, a movie still, a fitness app banner, or a vertical story cover. Those outputs may share a subject but require different framing and empty space. Start by naming the job: "vertical Instagram Story cover for a trail-running event" gives the composition a purpose. Add the aspect ratio or orientation next, followed by where copy must fit. Even if you plan to add typography later, reserving a quiet region prevents the subject and background detail from occupying every useful part of the frame.
Another failure comes from adjective stacking. Words such as "premium, dramatic, stunning, epic, cinematic, elegant" sound specific to a person but do not define visible decisions. Replace each broad adjective with evidence. "Premium" might mean a restrained black-and-silver palette, a single hard rim light, controlled reflections, and generous negative space. "Cinematic" might mean a low camera position, shallow depth of field, practical backlight, and subtle film grain. You do not need all of those choices in every prompt; you need the two or three that explain what the adjective means for this asset.
Prompts also underdeliver when they contain unresolved conflicts. A request for a flat-lay product image and an eye-level camera asks for two viewpoints. A crisp catalog packshot and heavy motion blur pull the rendering in opposite directions. Likewise, "minimal background filled with detailed props" gives no clear priority. Read the prompt as a shot list before generating. When two instructions compete, decide which one controls the composition and remove or subordinate the other.
Finally, creators often ask the model to solve layout, copywriting, branding, and legal text in one render. Short display text can be part of a concept image, but exact small print, ingredients, terms, and regulated claims should be applied in a design tool after the visual direction is approved. This is not a reason to avoid text in prompts. It is a reason to label each text element by role, quote the exact wording, keep it brief, and judge the generated asset as a creative draft rather than final production artwork.
2. A Reusable Prompt Structure for Grok Imagine Image

A strong Grok Imagine Image prompt is a compact asset brief that defines the image's purpose, visible hierarchy, rendering choices, and boundaries. The most reliable order is: Goal, Canvas, Subject, Composition, Light, Camera, Finish, Constraints. Each layer answers a different production question, so the model receives priorities instead of an undifferentiated paragraph of details.
The order matters more than prompt length. You can write a useful 60-word brief when the asset is simple, while a reference edit may need 150 words to distinguish changes from protected details. The xAI image generation guide is the appropriate place to check current vendor-level capabilities; the framework below is a practical writing method rather than a claim that one fixed syntax is required.
2.1 Subject, Medium, Lighting, and Camera
Begin with the goal and canvas because they control every later choice. Name the asset in plain language: ecommerce hero image, podcast cover, editorial portrait, event poster background, or concept frame. Then state orientation and composition needs, such as "4:5 portrait with clear space in the upper third for a headline." These instructions turn empty space into part of the deliverable rather than an accidental blank area.
Next, define the subject with concrete attributes that affect recognition. For a product, include material, shape, color, label orientation, and scale in the frame. For a person, describe wardrobe, action, expression, pose, and relationship to the environment without overloading identity details. Composition should explain where the focal subject sits, how large it appears, what occupies foreground and background, and where the viewer's eye should travel. "Bottle centered" is weaker than "bottle occupying 55% of frame height, slightly left of center, cap and front label fully visible, with open space on the right."
Lighting and camera language should clarify form rather than decorate the prompt. A soft side light reveals texture gently; a narrow backlight separates a dark object from a dark set; large frontal diffusion reduces hard facial shadows. Camera terms are useful when they change the viewer's relationship to the subject: eye level feels direct, a low angle adds scale, a top-down view organizes objects, and a longer portrait perspective can reduce wide-angle distortion. Avoid adding lens numbers merely because they sound photographic. If you cannot explain what a camera choice contributes, omit it and describe the visible result instead.
Finish the visual description with medium and surface treatment. This may be studio photography, editorial flash, ink illustration, cut-paper collage, soft 3D rendering, or documentary still photography. Add a limited palette, texture, and contrast behavior where relevant. A coherent finish section might read: "clean commercial photography, cool white background, controlled silver reflections, crisp edges, restrained contrast." Every phrase points to something you can inspect in the output.
2.2 Constraint Language That Gives the Model Priorities
Constraints work best when they protect the brief, not when they become a long catalog of feared mistakes. Positive structure comes first: say where the subject and empty space belong, then add a short constraint block for likely failure points. A product prompt might end with "front label readable, cap unobstructed, no extra products, no hands, no cropped edges." A portrait might use "natural skin texture, both hands visible only if included, no beauty-ad retouching, no background text."
Use direct, observable language. "Do not make it bad" offers no visual criterion, while "avoid clipped highlights on the glass and keep the label flat to camera" defines two checks. Do not negate an element that has not appeared elsewhere unless it is a common failure for that exact scene. Ten irrelevant exclusions can compete with the subject description and make revision harder.
For generated text, constraints should establish wording and hierarchy. Put exact copy in quotation marks, assign a role, and limit the number of lines. If precise typography is essential, plan to rebuild the type after generation. The prompt should reserve the hierarchy and placement even when the final lettering will be typeset manually.
2.3 Reference Images and Edit Instructions
Reference-based work needs a different grammar from fresh generation. First assign each input a job: one image defines the product, another defines the lighting, and a third may define the layout. Do not say "combine these references" and expect the model to infer which properties matter. Instead write, "Use reference 1 for bottle shape and label colors; use reference 2 only for the hard side-light direction; do not copy objects from reference 2."
Then split the edit into Change and Preserve clauses. The Change clause should contain the smallest meaningful transformation: replace the background, alter wardrobe color, remove a reflection, widen the crop, or shift the time of day. The Preserve clause protects identity, geometry, branding, pose, framing, or texture. This division reduces the chance that a local request becomes a full reinterpretation.
When the first edit misses, continue with a delta instruction instead of resending a completely different brief. "Keep the previous composition; reduce the orange cast, move the shadow slightly right, and restore the original label proportions" tells the model what changed between review rounds. That habit also makes your own decisions easier to track. You are directing a revision, not reopening the entire art direction.
3. Prompt Patterns by Use Case
The patterns below are decision guides rather than complete scripts. Use them to choose the visible details that matter for each asset, then remove any instruction that does not serve the goal. After each generation, compare the result with the brief and revise the smallest failing layer.
3.1 Social Cover With Copy Space
This pattern makes the future text region part of the composition. If the model keeps filling that region, reduce the number of environmental details and describe the space as a simple surface or sky rather than merely asking for "negative space." The latter is a design concept; the former is a visible instruction.
3.2 Product Hero Image
Product prompts improve when props explain context rather than compete for attention. For a citrus drink, one cut citrus segment and a small condensation cue may be enough; a table crowded with fruit, leaves, ice, splashes, and utensils can obscure the package. If brand accuracy is critical, use the product photo as a reference and place its geometry in the Preserve clause.
3.3 Editorial Portrait
Portrait detail should support mood without creating a synthetic face specification. Expression, gaze, posture, wardrobe, and light usually provide more control than a long inventory of facial traits. When editing a real portrait, use only images you own or have permission to edit, and explicitly preserve identity-defining features unless the authorized creative brief requires a change.
3.4 Reference-Based Background Edit
The key instruction is the match clause. Background replacement fails visibly when perspective, shadow direction, and color temperature disagree with the retained subject. Review those three properties before asking for more detail or stronger style.
4. Visual Grok Imagine Image Output Examples
The examples below show how prompt decisions appear in finished assets. Apply the same patterns in the Grok Imagine Image Quality workspace, and check the model page for current availability and credit rates.
Disclosure: Vofy is the demonstration interface; the prompt-writing principles also apply in other supported Grok Imagine interfaces.
4.1 Editorial Portrait

A restrained environmental portrait with realistic proportions, soft window light, and a simplified studio setting.
Expected output: a believable editorial portrait with natural skin texture, a clear environmental context, and enough quiet space for accompanying copy.
4.2 Minimal Skincare Launch Visual

A restrained serum product hero with a translucent bottle, pale plinth, circular ripple detailing, and open campaign space.
Expected output: a restrained product hero with readable object separation and a usable headline zone. If the bottle becomes too small, change only the frame-height percentage. If the label angle drifts, strengthen "flat front label facing camera" without changing the lighting paragraph.
4.3 Night-Market Podcast Cover

A square editorial podcast-cover background with a clear human focal point and low-detail space for later typography.
Expected output: an editorial cover background with a human focal point and sufficient contrast for later typography. If the left side remains busy, replace "distant market" with "simple dark fabric wall" rather than adding more negative instructions.
4.4 Compact Headline Poster

A vertical cycling poster with a short display headline, strong subject contrast, and restrained signal-yellow color.
Expected output: a bold key visual with a short display headline integrated into the hierarchy. Treat the generated lettering as a layout proposal. For a public campaign, rebuild final typography and sponsor information in a design application after the image is approved.
4.5 Product Background Revision


Before and after: the background changes from a plain studio setup to a softly lit home office while preserving the headphone shape, materials, color, and camera angle.
Expected output: a context change that retains the supplied product rather than redesigning it. If the product shifts, repeat the original image and issue a narrower delta: "restore the original product pixels and change only the background and contact shadow." For broader editing patterns, compare the preservation language in the GPT Image 2 editing guide.
5. Troubleshooting When the Output Looks Wrong
Prompt troubleshooting should be a review process, not a fresh round of creative writing. First identify whether the failure concerns hierarchy, geometry, light, style, text, or preservation. Then revise the prompt layer responsible for that failure while holding the other layers stable. This gives you evidence about which instruction changed the render.
| Problem | Likely cause | Focused revision |
|---|---|---|
| Subject is too small | No scale relationship | Add a frame-height percentage or crop description |
| Copy area is cluttered | Environment has equal priority | Replace that region with a simple visible surface |
| Product shape changes | Edit and preserve instructions are mixed | Separate Change and Preserve clauses |
| Image feels generic | Style is adjective-only | Add specific palette, light behavior, medium, and texture |
| Lighting looks inconsistent | Multiple directions or vague mood terms | Choose one key-light direction and one fill behavior |
| Text layout is weak | Too much copy or no hierarchy | Keep one short quoted headline and assign its position |
After fixing the primary failure, inspect secondary effects. Enlarging a subject may remove copy space; simplifying a background may reduce depth; a stronger rim light may create unwanted reflections. Keep a short revision log with the prompt version, the single change, and the result. Three controlled iterations usually teach you more about a brief than three unrelated prompts, even when the final image still needs manual retouching.
If results remain unstable, simplify the scene. Remove secondary props, reduce competing color instructions, and choose either realistic photography or an illustrative treatment rather than blending several media at once. For photorealistic work, the guide to fixing artificial-looking AI images offers a separate diagnostic path for skin, materials, depth, and lighting cues.
6. Conclusion
Better Grok Imagine Image prompts do not depend on maximal detail. They depend on ordered decisions: define the asset, establish composition, describe visible rendering choices, and protect the elements that must not change. That structure makes the first result easier to evaluate and every later revision easier to direct.
The practical warning is simple: do not confuse prompt length with control. A short brief with a clear subject scale, one light direction, and explicit preservation rules is more useful than a long paragraph of moods. Build the image one decision layer at a time, and let each generation answer a specific production question.
FAQ
What is a good Grok Imagine Image prompt structure?
Use this order: Goal, Canvas, Subject, Composition, Light, Camera, Finish, and Constraints. For image edits, add separate Change and Preserve clauses. The goal and composition should carry the most weight; camera and style terms should explain visible results rather than serve as decorative jargon.
How long should a Grok Imagine Image prompt be?
Use the shortest prompt that resolves the important production decisions. A simple social background may need 60 to 100 words, while an authorized reference edit may need more space to protect identity, product geometry, or branding. Length itself is not a quality signal.
Should I use negative prompts?
Use a short constraint block for likely failures, but define the desired image first. Observable constraints such as "no cropped cap" or "preserve the original logo placement" are more actionable than broad phrases such as "no bad anatomy." Too many unrelated exclusions can obscure the creative hierarchy.
Can Grok Imagine Image generate text inside an image?
You can request short display text by quoting the exact wording and assigning its role, position, and hierarchy. Treat the result as a design draft and verify every character. Add long copy, legal language, prices, and final brand typography in a layout tool after approving the image.
How should I prompt an existing-image edit?
Assign each reference a role, state the smallest requested change, and list the elements to preserve. Continue later rounds with delta instructions such as "keep the composition, reduce the warm cast, and restore the original label proportions." Use only source images you own or have permission to edit.
Is Grok Imagine Image Quality the same as every Grok Imagine image model?
It is one route within the Grok Imagine image family, and availability can evolve. This article reflects Grok Imagine Image Quality on Vofy in July 2026. Check Vofy's current model page and the xAI model documentation for current names and supported options before planning a production workflow.
Related Reading
Try it yourself on Vofy
Generate AI images and videos with the best models - all in one studio.
Discover More

 Ryan Mitchell•
How to Write Better GPT Image 2 Prompts
Learn a reusable framework for GPT Image 2 prompts across photos, products, portraits, posters, and social graphics, with real examples and clearer control.
 Ryan Mitchell•
How to Edit Existing Images with GPT Image 2
Learn how to edit existing images with GPT Image 2 for background changes, object cleanup, layout fixes, and fast marketing-ready asset variations.
Grok Imagine Image Quality
Grok Imagine Image Quality is xAI's recommended higher-quality image model replacing the retiring Pro tier. On Vofy, it supports prompt-based creation, image edits, broad style transfer, and multi-turn refinement at up to 2K with up to 10 outputs per run.