How to Use an AI Beauty Filter for Natural Retouching
Learn how to use an AI beauty filter for natural selfie retouching, brighter eyes, balanced skin, and portraits that still look like you.

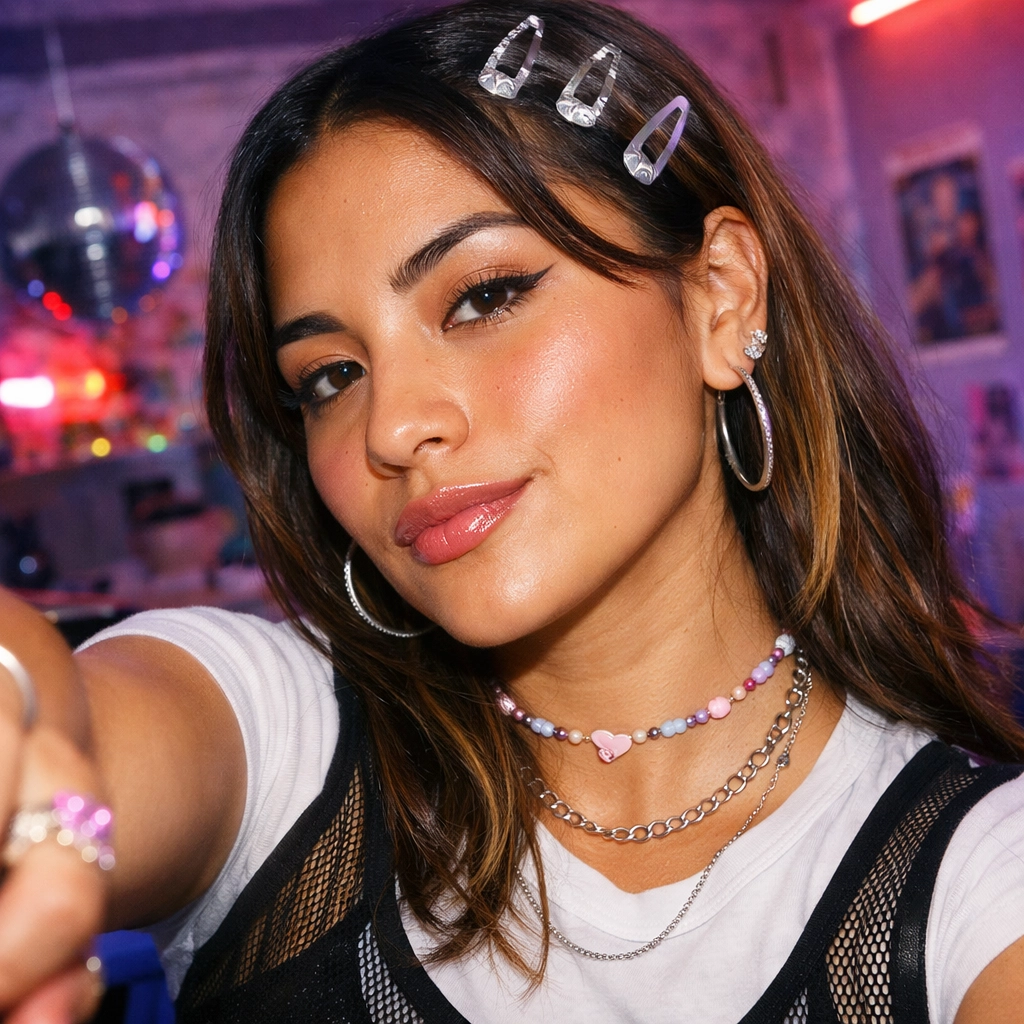
Disclosure: This tutorial uses Vofy, an all-in-one AI creative studio, as the demonstration tool. The workflow reflects the app as available in July 2026, and interface details may evolve.
An AI beauty filter works best as a restrained finishing pass. It can soften minor blemishes, balance visible skin tone, brighten tired eyes, and add gentle polish without replacing the person in the photo. The Vofy AI Beauty Filter offers five focused finishes and an optional note for controlling what changes.
The goal is preservation: keep face shape, expression, skin-tone family, hair, age cues, freckles or marks you value, background, and lighting consistent with the source. For complexion-only edits, see the AI skin enhancer guide.
TL;DR
- Upload one sharp, well-lit selfie, headshot, or portrait.
- Start with Natural Glow, then choose a more specific finish only when needed.
- Use the optional note to protect freckles, pores, smile lines, face shape, and makeup level.
- Compare the result with the original and reject edits that change identity or remove natural texture.
A lighter edit is usually more convincing than a stronger filter.
1. What You'll Get
An AI beauty filter coordinates several small portrait adjustments in one pass. It differs from localized retouching, which corrects one detail, and from a makeup filter, which emphasizes cosmetic styling.
| Goal | Best Finish | Preserve |
|---|---|---|
| Freshen the full portrait | Natural Glow | Identity, expression, texture, original light |
| Reduce visible spots or uneven patches | Clean Skin | Pores, freckles, natural tone variation |
| Add restrained cosmetic polish | Soft Glam | Face structure, age cues, hair, background |
| Refresh a tired eye area | Bright Eyes | Eye shape, iris color, nearby facial detail |
| Prepare a social or professional photo | Profile Ready | Honest likeness, framing, clothing, setting |
Choose the narrowest finish that solves the visible issue. Clear selfies, creator thumbnails, dating profiles, and headshots are good candidates; tiny, blurred, obstructed, or heavily filtered faces are not.
2. Before You Start
Use only photos you own or have permission to edit. Do not retouch another person's portrait to impersonate them, misrepresent identity, or support a false product claim. Beauty editing is not a medical assessment and cannot predict real treatment results.
Choose a source where one face is reasonably large, in focus, and evenly lit. Avoid sunglasses, hands over the face, deep shadows, and screenshots that have been compressed repeatedly. Adobe's official overview of retouching and repair tools provides useful context for localized photo cleanup.
Before uploading, confirm that:
- The eyes, mouth, and chin are visible.
- The expression and framing are worth preserving.
- You know the one or two details you want to refine.
- You can name at least two details that must not change.
This turns a vague request into a bounded edit. For example: "Soften under-eye tiredness and balance tone; keep freckles, smile lines, and face shape."
3. Apply the AI Beauty Filter in 3 Steps
3.1 Upload a Clear Portrait
Open the AI Beauty Filter app and upload a selfie, headshot, close-up, or portrait. Natural angles and expressions work well when facial detail remains visible. Before continuing, identify the feature that matters most - perhaps freckles, mature skin texture, a beard, warm light, or a low-makeup look.
3.2 Choose a Finish
Use this quick decision guide:
- Natural Glow: restrained skin polish, balanced tone, and subtle eye brightness.
- Clean Skin: focused cleanup for spots, uneven patches, or mild discoloration.
- Soft Glam: gentle lash definition, lip polish, and a more styled finish.
- Bright Eyes: lighter under-eye tiredness while keeping the rest stable.
- Profile Ready: balanced cleanup for creator, dating, or professional photos.
When a preset is too broad, add a short note with three parts: the change, the features to preserve, and the intensity limit.
Reduce under-eye tiredness and lightly balance the complexion. Keep freckles, pores, smile lines, eye color, and face shape unchanged. No heavy makeup or contour.
Keep the first request narrow. Combining beauty retouching, reshaping, hair replacement, and background editing makes unwanted changes harder to diagnose.
3.3 Generate and Compare
Generate the edit, then compare it with the original at normal size and close zoom. Check four things:
- The subject is immediately recognizable.
- Real skin texture remains visible.
- Eye shape and color are unchanged.
- Lighting still belongs to the original scene.
Inspect the hairline, eyes, lips, jaw edge, and jewelry for warping or duplicated texture. If the edit fails any check, use a lighter finish or a narrower note instead of accepting the first result.
For public profiles and sponsored content, keep the edit honest about the person and context. The FTC's social media disclosure guidance is a useful reference when edited media appears in advertising or endorsements.
4. Tips for Natural Results
- Say what to preserve as clearly as what to change.
- Match intensity to the viewing context: thumbnails can use slightly clearer contrast, while dating and professional profiles benefit from a lighter touch.
- Correct one detail at a time when possible.
- Review the image at its intended display size before downloading.
If eye color is the actual goal, use the dedicated AI eye color guide so the rest of the portrait stays outside the edit scope. For a broader professional transformation involving crop, wardrobe, or background, use the selfie-to-LinkedIn-headshot workflow.
5. Common Mistakes
Avoid these common causes of unnatural results:
- Starting with a blurry, obstructed, or heavily filtered image.
- Asking for "perfect skin" without preservation instructions.
- Choosing Soft Glam when one localized correction is enough.
- Combining several major edits in one generation.
- Checking only the thumbnail and missing close-up artifacts.
- Publishing an edit without the subject's permission.
The usual fix is to reduce scope: return to the cleanest source, choose the lightest suitable finish, and describe both the change and the boundary.
6. Conclusion
A natural AI beauty filter should make a portrait feel prepared, not replaced. Start with a clear source, choose the lightest relevant finish, protect defining features in the optional note, and compare the output at two scales. Try the AI Beauty Filter and keep only a result that remains unmistakably faithful to the original portrait.
FAQ
What does an AI beauty filter do?
It coordinates mild skin cleanup, complexion balancing, eye-area brightness, and overall portrait polish while aiming to preserve the same person.
Which preset should I choose first?
Start with Natural Glow. Use Clean Skin for complexion cleanup, Soft Glam for cosmetic styling, Bright Eyes for a tired eye area, or Profile Ready for a balanced profile-photo finish.
Can I keep freckles, pores, and smile lines?
Yes. Add a note such as "keep freckles and pores visible, preserve smile lines, and use lighter skin smoothing," then verify those details in the output.
Will the filter change my face shape or identity?
It is designed to preserve them, but generative edits can vary. Reject any result that changes face shape, eye shape, age cues, ethnicity, or another defining feature.
Is an AI beauty filter the same as a makeup filter?
No. A beauty filter balances the portrait as a whole, while a makeup filter focuses on lashes, lip color, blush, contour, or another cosmetic style.
What photos should I avoid?
Avoid motion blur, strong existing filters, very small faces, deep shadows, low-resolution screenshots, and major occlusion from sunglasses or hands.
Related Reading
Try it yourself on Vofy
Generate AI images and videos with the best models - all in one studio.
Discover More

 Priya Sharma•
AI Skin Enhancer: One-Click Portrait Retouching in 2026
Transform portraits with AI skin enhancement in one click. Choose Soft, Realistic, or Imperfect styles for professional retouching without Photoshop. Perfect for photographers, content creators, and social media.
 Priya Sharma•
Free AI Eye Color Changer: Transform Your Look Instantly
Free AI eye color changer—try ice blue, emerald green, warm hazel, silver gray, honey brown, violet, or dramatic black eyes instantly. Change brown eyes to blue in seconds, no contacts needed.
 Sofia Rodriguez•
How to Create a Professional LinkedIn Headshot With AI
Transform selfies into professional LinkedIn headshots instantly with our free AI generator. Get polished, studio-quality profile photos in 2 minutes—perfect for job seekers, founders, and remote workers.