How to Use an AI Muscle Generator for Realistic Photos
Learn how to use an AI muscle generator, choose a clear source photo, avoid anatomy errors, and create a realistic athletic edit you can share responsibly.
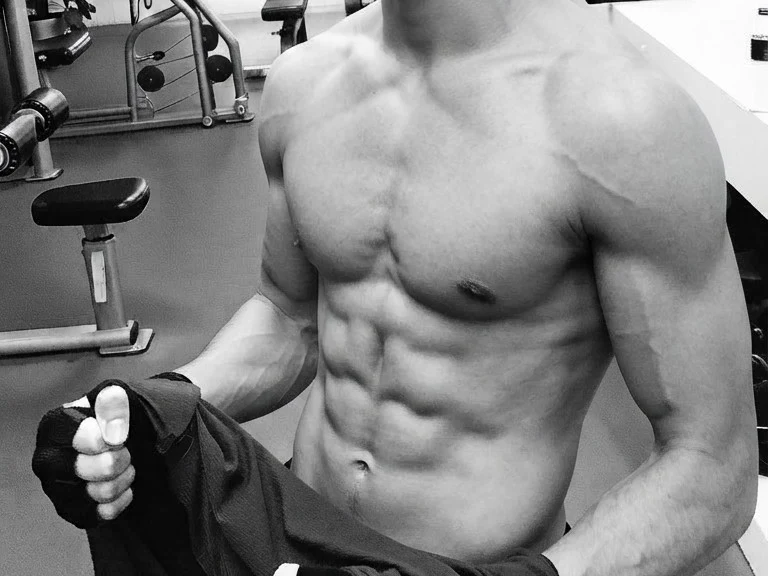
Disclosure: This tutorial uses Vofy, an all-in-one AI creative studio, as the demonstration tool. The workflow reflects the app available in July 2026, and the interface may change.
Bad muscle edits usually give themselves away somewhere boring. A sleeve melts into a bicep. One shoulder sits higher than the other. The door frame behind the subject develops a curve. At first glance the person looks bigger, but a second look breaks the illusion.
The AI Muscle Generator takes one adult photo and creates a more athletic version of it. Getting a usable result is less about chasing the largest possible transformation and more about choosing a photo the model can understand, then knowing what to inspect afterward. This guide covers both.
The output is an AI-generated visualization. It is not proof of training progress, a prediction of how someone will look in the future, or medical guidance.
TL;DR
- Use a clear adult photo with both shoulders visible and some space around the upper body.
- Fitted, simple clothing tends to hold up better than heavy jackets, crossed arms, or busy patterns.
- Judge the face, shoulder joints, hands, fabric, and background before judging muscle size.
- Regenerate if identity or anatomy changes, and disclose the edit if you publish it.
1. What Is an AI Muscle Generator?
An AI muscle generator edits an existing photo to add athletic definition. It uses the uploaded image as a reference for the person's face, pose, clothing, camera angle, and surroundings, then reshapes areas such as the shoulders, arms, chest, and visible torso. The aim is an edited version of the same photograph, not a new person created from scratch.
Vofy's app accepts one image. There is no body mask to paint and no second photo to supply. It also keeps the original framing, so the crop you upload has a strong influence on the result. If both shoulders and most of the torso are in frame, the model has room to balance the change. If an elbow or half the chest is already missing, it has to guess what belongs outside the crop.
Clothing changes what is possible. A fitted T-shirt can support broader shoulders and clearer arm definition while still looking like the same garment. A thick hoodie cannot suddenly reveal six-pack detail without becoming a different piece of clothing. Bare skin provides more anatomical information, but it also makes errors around the ribs, collarbones, and waist easier to spot. In either case, proportion matters more than size.


2. Key Features of a Good Source Photo
Use a photo you own or have permission to edit. The subject must be an adult and should know how the result will be used. Do not upload images of minors, explicit photos, or someone else's portrait without consent. A generated body edit should never be used for harassment, body shaming, identity verification, or a false fitness claim.
Once consent is covered, look at the photo as raw material. The model needs to separate the body from the clothing and the background. Soft compression, deep shadow, or a hand pressed against the torso can make those boundaries ambiguous. When the original does not clearly show where the arm ends and the shirt begins, the generated image may not know either.
A good source photo usually has these qualities:
- one adult subject, clearly separated from the background;
- a face that is large enough to recognize;
- both shoulder joints and at least part of the torso in frame;
- even enough lighting to show the edges of the body and clothing;
- arms that are not tangled with equipment, furniture, or another person;
- a simple background with some breathing room around the silhouette.
You do not need a studio portrait. A clean mirror photo, gym shot, or upper-body photo in a fitted top can work. Watch out for phone cameras used too close to the body, though: wide-angle distortion can make the nearest shoulder or arm look much larger before the AI touches it. If the source already feels stretched or off-balance, choose another frame rather than asking the generator to repair it while changing the body.
3. How to Use the AI Muscle Generator
The app itself is straightforward: upload, generate, review. Most of the judgment happens in the first and third steps.
3.1 Upload one clear adult photo
Open the AI Muscle Generator and choose the frame that best shows the area you care about. For shoulders and arms, include both shoulder joints and leave a little space on either side. For torso definition, avoid a crop that ends at the chest or a pose with forearms covering the stomach.
Use a single-person image. Group photos make it harder to tell which body should change, while a side pose or a hidden arm gives the model anatomy it has to invent. That does not mean every photo must be a straight-on passport pose. A slight turn often looks more natural; the important part is that the main joints and body outline remain readable.
3.2 Generate the athletic version
Run the transformation and look at the overall balance before zooming in. Has the posture improved without turning rigid? Do the shoulders look broader but still fit the neck and head? Does the shirt stretch in a way real fabric might stretch? A restrained result often survives close inspection better than the most dramatic option.
Do not treat the first output as a final answer. Image generation varies from run to run, and another attempt may preserve the face or clothing better even when the body change is similar. If the proportions feel too extreme, regenerate from the same source and compare the full images side by side.


3.3 Inspect the result before downloading
Compare the original and generated images at the same size. Start with the face. Check the eyes, jaw, ears, hairline, and any small feature that makes the person recognizable. Then move to the neck, shoulder joints, elbows, hands, shirt seams, and waist. Finish with straight objects in the background, such as door frames, mirrors, tiles, or gym racks. Those lines are excellent at exposing a warped silhouette edit.
Regenerate when an error changes identity, anatomy, or the geometry of the scene. A slight shift in skin texture may be acceptable for a private concept image; an extra finger, a melted sleeve, or a curved wall is not. Keep the version that preserves the logic of the photograph, even if another version has more visible muscle. The guide to fixing fake-looking AI images has a broader artifact checklist for the final review.
4. Tips for More Realistic Results
Some failures look like model problems but begin with the source photo. The table below pairs common artifacts with a more useful next attempt.
| What looks wrong | What probably caused it | What to try next |
|---|---|---|
| One shoulder is much larger | The pose or crop hides the opposite shoulder | Use a straighter frame with both joints visible |
| Shirt seams melt into the body | Loose or patterned fabric conflicts with the new shape | Try a fitted, simple top with clear edges |
| Hands or elbows duplicate | Limbs overlap the torso or nearby objects | Choose a frame with separated arms |
| The wall bends around the subject | The new silhouette pulled the background with it | Use a simpler background with more space |
| The face no longer looks right | The face is small, blurred, or poorly lit | Upload a sharper photo with readable features |
| The body looks cartoonishly large | The change does not fit the pose or perspective | Keep the same source and regenerate |
No single source-photo change guarantees a clean output, but the pattern is useful: reduce ambiguity before you ask for another result. For example, changing from a patterned overshirt to a plain fitted T-shirt gives the model clearer fabric edges. Moving a half-step away from a mirror leaves more background around the arms and makes silhouette warping easier to avoid.
Resist the urge to fix every part of the portrait in one pass. Body reshaping, skin smoothing, teeth whitening, and face changes all introduce their own failure points. Finish the body edit first and save it as a separate version. If the portrait still needs restrained cleanup, use the AI skin enhancer guide as a separate workflow.
5. Best Use Cases and Responsible Sharing
An AI muscle photo can be useful as concept material. A fitness creator might test thumbnail composition, compare fitted-shirt styles, or explore a stronger character direction before a shoot. Someone planning a fictional character or private mood board may simply want to see how a different silhouette changes the image. Those are creative uses, and they do not require pretending the body is real.
Problems start when the generated image is attached to a factual claim. Do not pair it with a fake training timeline, weight change, supplement result, or transformation testimonial. Keep the original and generated files separate, give the edited version a descriptive filename, and disclose that it was AI-generated or altered wherever viewers could reasonably mistake it for documentary evidence.
Platform rules differ and change over time. YouTube publishes guidance on altered or synthetic content, and the U.S. Federal Trade Commission maintains advertising and marketing guidance for commercial claims. Check the rules for the platform and country where you plan to publish.
Also ask whether the muscle edit serves the final image. For a professional profile photo, natural posture, a clean crop, and modest retouching may communicate more than a visibly altered physique. In that situation, the selfie-to-LinkedIn-headshot workflow is the more appropriate tool.


6. Conclusion
A simple rule produces better muscle edits: preserve the photo before you enhance the body. Start with a clear, authorized image; choose a proportional result; and reject any version that changes the face, breaks the anatomy, melts the clothing, or bends the room.
The same rule applies when you share the image. An AI-generated physique can work as a visual concept, but it should never stand in for real progress or a promised outcome. A believable edit is useful. A misleading one is not. When you have a clear adult photo and permission to edit it, AI Muscle Generator and compare the result with the original at full size before downloading.
FAQ
What kind of photo works best with an AI muscle generator?
Does the Vofy AI Muscle Generator create a different person?
Can I use the image as a real fitness before-and-after?
Can I upload somebody else's photo?
Why do shirts, hands, and backgrounds sometimes warp?
Which model does the app use?
gemini-3.1-flash-lite-image. App configuration and model availability can change, so check the live app for the current version.Related Reading
Try it yourself on Vofy
Generate AI images and videos with the best models - all in one studio.
Discover More

 Ryan Mitchell•
Why AI Images Still Look Fake — and How to Fix It
Master advanced Nano Banana 2 techniques to fix fake-looking AI images. Learn the technical reasons behind common artifacts, physics-based solutions, and edge cases that separate amateur from professional photorealistic results.

 Priya Sharma•
AI Skin Enhancer: One-Click Portrait Retouching in 2026
Transform portraits with AI skin enhancement in one click. Choose Soft, Realistic, or Imperfect styles for professional retouching without Photoshop. Perfect for photographers, content creators, and social media.
 Sofia Rodriguez•
How to Create a Professional LinkedIn Headshot With AI
Transform selfies into professional LinkedIn headshots instantly with our free AI generator. Get polished, studio-quality profile photos in 2 minutes—perfect for job seekers, founders, and remote workers.