AI Face Swap: How to Swap Faces in Photos Naturally
Learn how to use AI face swap with two photos, choose the right Vofy preset, fix awkward blends, and create responsible, natural-looking edits.

Disclosure: This tutorial uses Vofy, an all-in-one AI creative studio, as the demonstration tool. The workflow and interface described here reflect the product as of August 2026 and may evolve.
A convincing face swap depends less on pressing Generate and more on pairing the right two photos. A sharp front-facing selfie will still produce an awkward result if the target face is tiny, turned far to the side, or lit from the opposite direction. Vofy's Face Swap app makes the roles explicit: the first upload supplies the identity, while the second supplies the pose, outfit, background, and composition. This guide explains how to choose those inputs, select a useful preset, inspect the result, and correct the problems that most often make a swap look pasted on.
Use only photos you own or have permission to edit. Do not create misleading content that impersonates real people, places someone in a harmful or sensitive context, or violates platform policies. Celebrity-inspired edits should remain clearly framed as entertainment, parody, or editorial concepts rather than evidence of a real event.
TL;DR
- Upload one clear source-face photo first and one target photo second.
- Match head angle, lighting direction, expression, and apparent camera distance before worrying about style.
- Start with Realistic Face Swap, then use Celebrity, Funny Meme, or Poster Style only when the final context calls for it.
- Inspect the eyes, jawline, hairline, skin tone, teeth, and neck transition before downloading.
- Treat the result as a newly generated image guided by both uploads, not a pixel-perfect edit of the target.
1. What You'll Get from an AI Face Swap
An AI face swap creates a new image from two visual references. The source establishes who should be recognizable, while the target sets the body position, camera angle, outfit, lighting, and scene. Good results reconcile those references instead of simply pasting one face over another.
That distinction matters because face replacement is not the same task as retouching. Retouching preserves the same identity while changing skin texture, color, or small details, and an expression edit changes the pose of an existing face. If changing the emotion is your actual goal, use the AI face expression guide instead. If the goal is a staged fan-style event image, the AI celebrity selfie guide covers that narrower composition.
Vofy's Face Swap app is designed for two-photo experiments such as creator thumbnails, reaction images, poster concepts, permitted jokes, and polished social graphics. As of August 2026, it generates a new image from both uploads rather than performing a literal pixel cutout. This gives the model room to reconcile lighting and facial geometry, but it also means the exact target pixels, small accessories, or background details may shift. The practical goal is a coherent result that preserves the intended identity and scene, not pixel-for-pixel preservation.
2. Before You Start: Choose a Compatible Photo Pair
Begin with the source face. A useful source image shows one person clearly, with open eyes, visible facial boundaries, natural detail, and limited obstruction from hair, hands, masks, or heavy sunglasses. A phone portrait is usually sufficient when the face occupies a meaningful part of the frame. Extreme beauty filters and motion blur remove the texture the model needs to understand skin, eyes, and proportions, so a simpler photo often beats a more glamorous but heavily processed one.
Next, evaluate the target as a composition rather than as a second portrait. The target should contain one dominant person with a readable face area and a pose you actually want to keep. Look at where the light comes from, how far the head turns, whether the mouth is open, and how much of the jaw is hidden. A target can be cinematic, stylized, or comedic, but the face still needs enough visual information for the replacement to settle into the scene.
Before uploading, use this compatibility check to catch the hardest problems to correct:
- Head angle: Pair front-facing with front-facing, or use only a modest difference in rotation.
- Lighting: Prefer images lit from a similar side and with a comparable level of contrast.
- Expression: Closed-mouth and relaxed expressions are easier to reconcile than a smile paired with a shout.
- Scale: Choose photos where both faces contain enough detail; avoid tiny faces in crowded scenes.
- Occlusion: Watch for hands, microphones, glasses, hats, hair, or props crossing the face boundary.
These factors do not need to match perfectly. They do need to be close enough that the model is solving a face-transfer problem rather than inventing missing geometry. When several factors conflict at once, changing one upload is usually more effective than repeatedly generating from the same pair.
Before publishing, decide how viewers will understand the edit. Label public-facing synthetic portraits when they could be mistaken for a real event or endorsement. C2PA provides a useful reference for media provenance, while the NIST AI Risk Management Framework offers broader guidance for teams managing AI-related risks. For campaign or editorial work, keep the original files, document consent, and retain a record of how the result was created.
3. How to Swap Faces with Vofy in 3 Steps
3.1 Upload the source face and target photo
Open the Face Swap app and add the source face to the first slot labeled Source face. This image tells the model whose identity should remain recognizable, including facial proportions, skin tone, and characteristic features. Add the desired scene to the second slot labeled Target photo. The target controls the final body framing, pose, outfit, background, and camera perspective, so reversing the order asks for the opposite result and is one of the easiest mistakes to make.
Pause before moving on and compare both faces at roughly the same on-screen size. If one is a distant full-body photo and the other is a tight headshot, inspect whether the target face still contains sharp eye, nose, mouth, and jaw detail. Crop the target image around its main subject before uploading when the original frame contains a large amount of unused space, but do not crop so tightly that the model loses the hairline, neck, or lighting context needed for a clean transition.
3.2 Choose the swap direction
The preset changes the visual direction, not the basic roles of the two uploads. Start with the option that matches where the result will be used rather than choosing the most dramatic label. Vofy currently provides four directions:
- Realistic Face Swap emphasizes natural skin detail, matched lighting, believable proportions, and a consistent camera look.
- Celebrity Face Swap adds a polished event-photo treatment suitable for clearly labeled entertainment or editorial concepts.
- Funny Meme Swap gives expression and reaction timing more weight when strict photorealism is less important than the joke.
- Poster Style Swap strengthens focal hierarchy, dramatic lighting, and thumbnail-ready composition.
Realistic Face Swap is the strongest diagnostic starting point because it introduces the fewest stylistic distractions. If the identity and geometry work there, a more expressive preset can build on a sound photo pair. If the first result already has a weak jawline or mismatched eyes, changing to Poster Style may hide the problem temporarily, but it will not repair an incompatible source and target.
3.3 Generate, inspect, and download
Generate the first version, then inspect it at full size before deciding whether it works. Start with identity: do the eyes, nose, mouth, facial proportions, and overall age still read like the source person? Then inspect integration: does the skin follow the target light, do the eyes point in the same direction, and do the jaw, ears, hairline, and neck join without a visible seam? Teeth, earrings, glasses, and strands of hair are useful stress points because errors often appear there before they become obvious elsewhere.
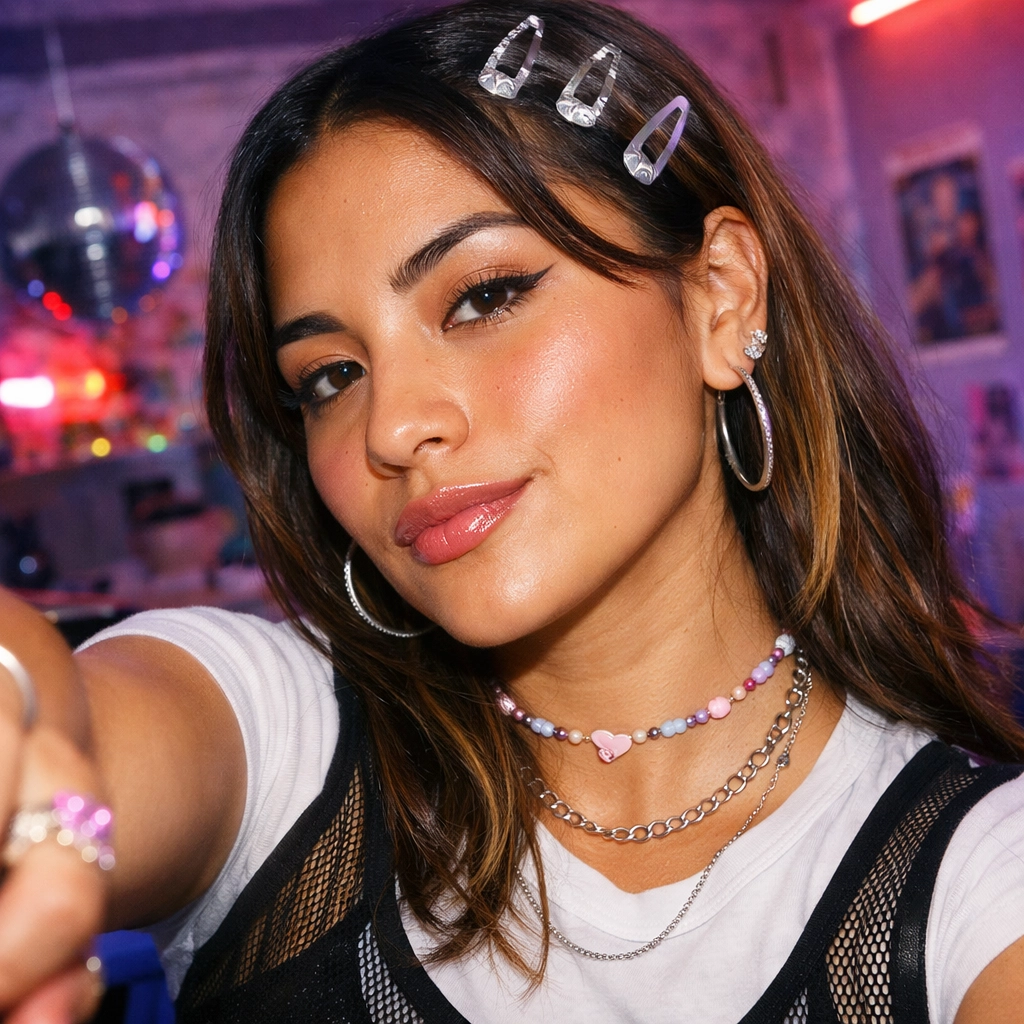
Real example: party portrait swap. The shipped Vofy example below uses a clear portrait as the identity reference and an event photo as the target composition. The generated result can then be judged against both inputs rather than viewed in isolation.


In this comparison, first check whether the result remains recognizably tied to the source face. Then compare it with the target for head scale, gaze direction, event lighting, and the transition from cheek to jaw and neck. The target scene does not need to remain pixel-identical, but the result should read as one coherent portrait rather than a face placed over a separate photograph. This same three-way check is more reliable than judging the generated image on its own.
When the result misses, change the input that explains the failure. A soft or generic identity usually calls for a sharper source face. A twisted jaw or drifting gaze usually points to an angle or expression mismatch. A flat, sticker-like face often means the lighting directions or image quality differ too much. Generate again only after making a specific correction; otherwise, repeated attempts may produce variety without addressing the underlying conflict.
Once the identity, edges, and scene read coherently, download the strongest version and keep the source and target alongside it for your own records. For another concept, return to the inputs rather than forcing one generated result through repeated edits. Try Face Swap with a compatible pair and use the first output as a diagnostic, not as an automatic final.
4. Tips for More Natural Face Swap Results
4.1 Match geometry before color
Creators often focus on skin tone first, but geometry usually exposes a poor swap sooner. A face seen straight on contains different visible information from a three-quarter or profile face: one ear may disappear, the nose overlaps the far cheek, and the jawline changes length. The model can infer some of that structure, but a large mismatch forces it to invent too much. Choose a source with a head rotation close to the target, then let the generation reconcile smaller differences in color and texture.
Apparent camera distance matters for the same reason. A wide-angle selfie can enlarge the center of the face, while a longer-lens portrait compresses facial depth. Pairing those extremes may preserve recognizable features but still make the face feel subtly wrong. When possible, compare the relative size of the nose, cheeks, and ears in both photos. Similar perspective gives the model a more stable foundation than matching background colors or clothing.
4.2 Read the failure by facial zone
Do not judge the whole image with a vague "looks fake" reaction. Divide the blend into zones and connect each error to a likely input problem. Eyes that differ in size or direction suggest an angle, expression, or occlusion mismatch. A sharp color break along the jaw suggests conflicting light or a target with deep facial shadow. A doubled hairline suggests that the source hairstyle is too visually dominant for the target boundary, while malformed teeth often come from pairing a closed-mouth source with an open-mouth target.
This diagnostic approach makes reruns deliberate. Replace the source when identity is weak across the entire face; replace the target when the pose, face size, or obstruction is the main obstacle. If only the overall finish is too plain for its destination, keep the pair and change the preset. One controlled change at a time also makes it easier to understand which decision improved the image.
4.3 Design for the final viewing size
A swap made for a small reaction post has different requirements from a portrait or thumbnail. At small sizes, a readable expression and strong silhouette matter more than tiny pore-level detail, which is why Funny Meme Swap can be appropriate even when it is less restrained. A poster or YouTube thumbnail needs a clean focal face, legible contrast, and enough negative space for later text. A realistic portrait deserves the strictest check around eyes, skin texture, hairline, and neck because viewers are more likely to inspect it closely.
Choose a workflow that matches the intended identity change. For professional profile images where the subject should remain the same person rather than be replaced, follow the selfie-to-LinkedIn headshot workflow instead.
5. Common Face Swap Mistakes to Avoid
The first common mistake is reversing the upload order. If the output preserves the wrong person, confirm that the identity reference is in the Source face slot. Clear file names such as source-face.jpg and target-scene.jpg are a simple safeguard when working through several variations.
The second mistake is asking style to solve a source-quality problem. A dramatic poster treatment can make an image feel more finished, but it cannot restore identity cues that were absent from a blurry, covered, or tiny source face. Similarly, repeated generation cannot make an extreme side-profile target behave like a front-facing portrait. Fix the pair first, then choose the finish.
The third mistake is evaluating only the face center. A convincing nose and mouth can distract from mismatched ears, a doubled jaw, a broken hairline, or a neck with the wrong light. Inspect the transition from forehead to hair, cheek to ear, and chin to neck at full size. Those borders determine whether the image reads as one photograph or two images forced together.
The most serious mistake is publishing a realistic result without consent or context. Do not use face swaps for harassment, sexual content, fraud, identity verification, fake endorsements, or fabricated evidence. Do not present a celebrity-inspired preset as a genuine encounter or place a person in an event they did not attend. The technical quality of a swap does not make a deceptive use acceptable.
6. Conclusion
Natural-looking face swaps begin before generation. Give the model a clear source identity, a readable target scene, compatible angles, and lighting it can reconcile. Use Realistic Face Swap to test the pair, move to a specialized preset only when the destination calls for it, and inspect the boundary zones rather than relying on a quick thumbnail impression.
The practical warning is simple: do not confuse generation variety with correction. If the same flaw survives more than one attempt, stop rerunning and replace the input responsible for it. A better photo pair usually contributes more to a believable, responsible face swap than another round of styling.
FAQ
How many photos do I need for Vofy Face Swap?
You need two photos: an identity reference in the Source face slot and the desired scene in the Target photo slot.
Why does my face swap look pasted on?
The most common causes are mismatched head angles, opposite lighting directions, different camera perspectives, low-resolution faces, and occlusions around the jaw or hairline. Replace the input that causes the mismatch instead of repeatedly generating from the same pair.
Can I use celebrity photos in an AI face swap?
Rules vary by jurisdiction and context. Use a photo you own or have licensed, obtain consent or permission to use the person's likeness where required, and clearly label entertainment, parody, or editorial edits. Do not imply a real encounter, endorsement, or event, and never use the result for harassment, fraud, sexual content, or misleading impersonation.
Does face swap preserve the target photo exactly?
No. Vofy Face Swap creates a newly generated image guided by both uploads rather than a literal pixel edit. It aims to preserve the target composition and source identity, but small background details, accessories, hair, or facial expression may change.
What should I do when the target image contains several people?
Use a crop or a different target with one dominant, clearly visible person. A crowded scene makes it harder to determine which face should be replaced and leaves fewer pixels for clean identity and edge detail.
Related Reading
Try it yourself on Vofy
Generate AI images and videos with the best models - all in one studio.
Discover More
 Sofia Rodriguez•
Take a Selfie with AI Celebrity: Your VIP Pass to Star-Studded Photos
Ever wanted to snap a selfie with your favorite celebrity? AI celebrity selfie generators make it happen in seconds. Create viral-worthy photos with stars, no VIP pass required.
 Sofia Rodriguez•
How to Change Face Expressions with AI (Free Online Tool)
Transform facial expressions instantly with free AI tools. Change photos from sad to happy, neutral to surprised—perfect for content creators and photographers.
 Sofia Rodriguez•
How to Create a Professional LinkedIn Headshot With AI
Transform selfies into professional LinkedIn headshots instantly with our free AI generator. Get polished, studio-quality profile photos in 2 minutes—perfect for job seekers, founders, and remote workers.